 background source: : funonline.in
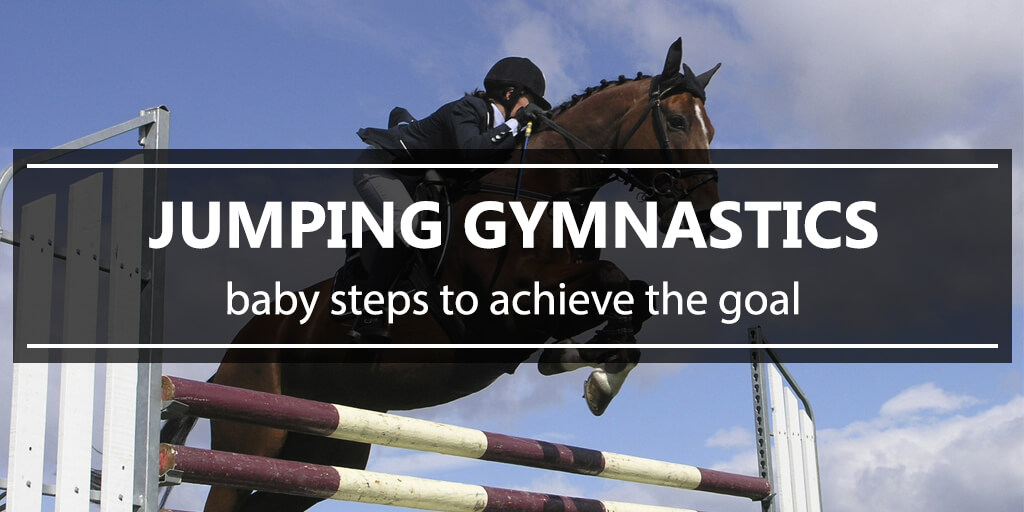
Gymnastic exercises at a trot are the classic method of introducing both the horse and rider into jumping. They also provide an excellent introduction to smooth jumps at a gallop.
Before you start your training
Before you start your training, concentrating on the jumping preparation, you have to realise that you success is dependant on the solid foundation. If there are some shortages in the basic training and you will overlook it whether when it comes to your training or your trainee's training - they will show, so all in all there will be a need to come back to the basics. It's worth to take baby steps at approaching the set goal, as an unexpirienced rider who would jump might harm both him- or herself and the horse.
Practice as long as performing the basic elements for you and the horse will become a routine (of course, you won't succeed on the first training, but during a few or so - certainly. It's not possible to focus on few complex task simultaneously - some movements and activities have to become as automatic as to become a part of what you do.
Remember that daily trainings on single obstacles and strings are better than jumping parkours. Hurdling the whole obstacle course is too invasive and tiring for the horse, and at the same time it doesn't allow us to repeat the jump several times, it doesn't give us time to think through the task between the jumps, and thus - it forecloses correction of the mistakes, both ours and those of the horse.
The most important in obtaining good results in the jumping discipline are:
stance - solid position, in balance, developed and automatic
concentration - setting goals and tasks before each jump
Exemplary preparing exercises
Below, we present you with a list of three stretching-warming-up exercises, which are worth to perform before taking the jumps.
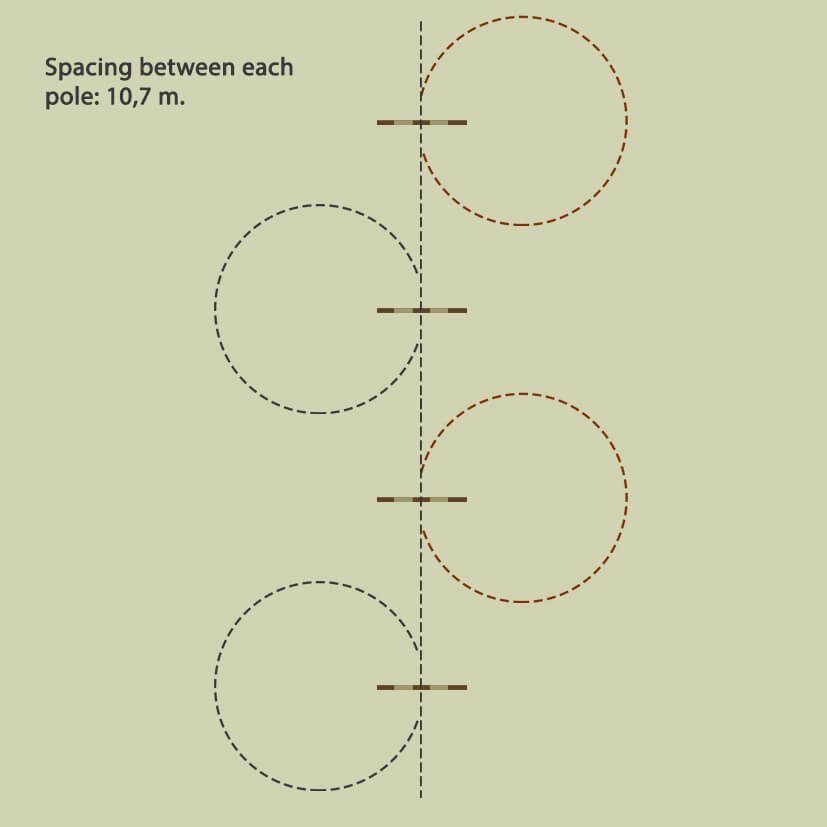
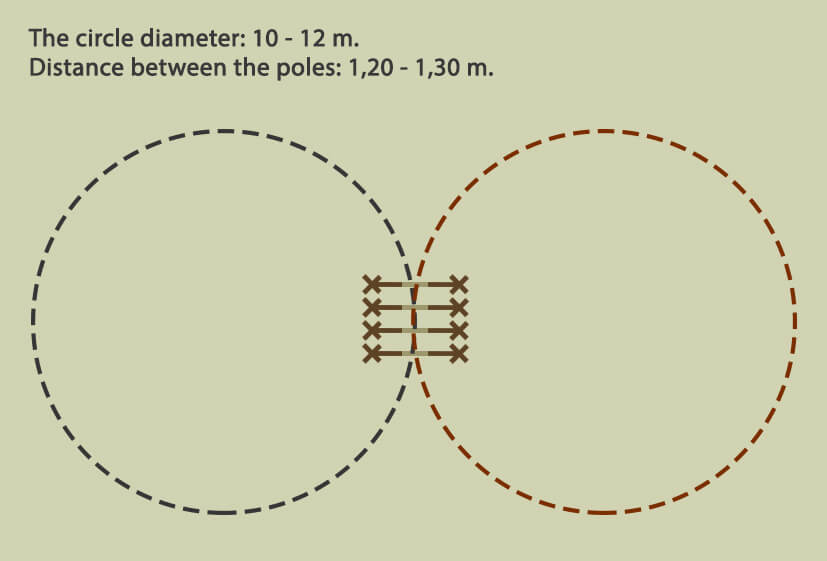
Poles and circles
How to practice
Trot through the middle of each pole, riding a volte between them of a 10-12 m diameter. Remember to perform the volts alternately - once to the left, once to the right. This exercise might be performed both at ride to the trot and in the half-seat. It's worth to pay attention to the performed circles, as performing a truly even and of proper size circle is not a piece of cake. The key to making the right circle is to outgo the course of riding with our sight and feeling the proper bend of the horse, meaning - the ability which is also necessary for ride on a parkour, moving from obstacle to obstacle and proper approach on them. Most horses tend to fall into the circle in one direction, at simultaneous falling out in the other direction. In result, the horse splits into two sections, where, for example, his front with the shoulder-blade falls into the circle, and the croup and hinder legs stick out of the set course. So, we have to watch out for the body line to coincide with line of the set circle, using proper aid (legs, hands and seat).
Pay attention
are the circles, which you perform, indeed round and of even size?
is your horse straight while jumping over each pole?
is your horse properly bend on the volts?
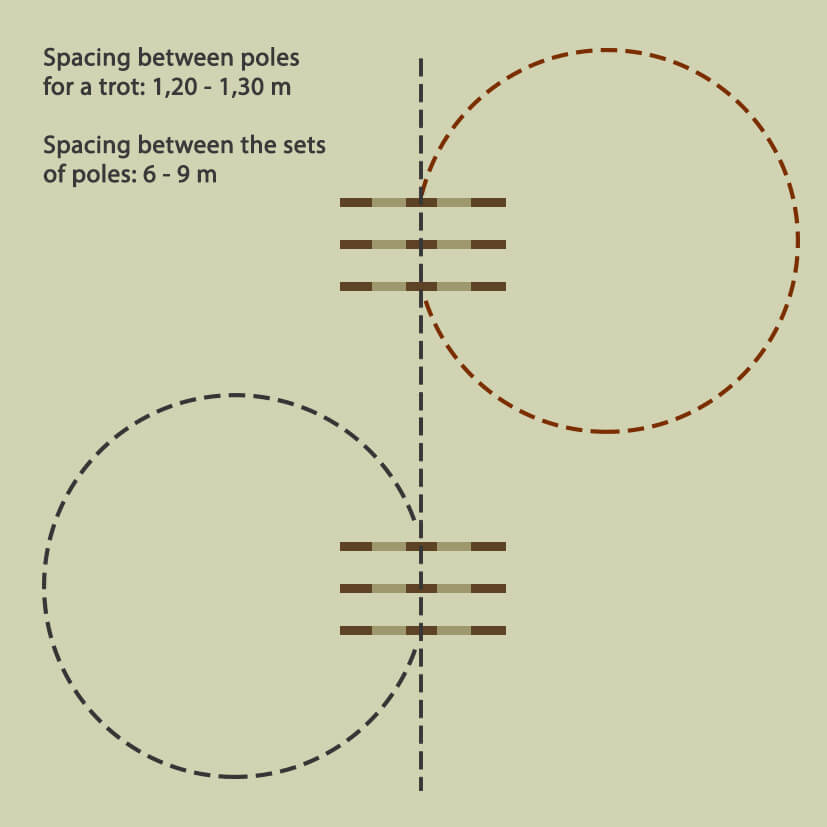
Rows of poles with riding circles
How to practice
Make the first row of poles in a straight line, keeping an even rhythm at a trot. After the third pole make a volte to the left, which end falls perfectly on the beginning of the first pole. Then you should ride through two rows of poles and start a volte after the last one, the volte should end at the beginning of the first pole of the second row. Remember that while approaching the poles, the horse has to be straight every single time. It requires from us to properly plan the course and lead the horse in such a way that he wouldn't lose the rhythm and approach the row while being straight.
Pay attention
are the circles, which you perform, indeed round and of even size?
is your horse straight while jumping over each pole?
is your horse properly bend on the volts?
Row of the ground poles on the figure of eight
How to practice
We start this exercise from approaching the ground poles (you can start from the poles lying flat on the ground and then gradually raise them), keeping the horse in a straight line, watching the regular rhythm at a trot. After the last pole of a row, we start a volte in the left direction, at a diameter of at least 12 m (at first it can be a much larger circle, which will be gradually lessened with time). Watching the picture of the circles, the volte should be finished by approaching a row of poles, after which we will do another volte to the right this time.
Remember that the higher the poles are, the more energy and concentration the horse has to put into completing the task. Even the not-so-tall ground poles (5-10 cm) forces the horse to increased effort. Only the experienced horses and those in systematic training are capable of jumping over a row of cavaletti of 25-30 cm height.
Pay attention
are the circles, which you perform, indeed round and of even size?
are you following the horse's movement while jumping over cavaletti?
are you "giving" the hand to the horse while jumping over cavaletti, so he could lower his head by balancing his neck?
is your horse straight while jumping over each pole?
is your horse properly bend on the volts?
Your posture while jumping

source: www.startinggate.ca
The jumping position, meaning the so-called half-seat is characterized by shifting the body weight on the legs, which positions the seat right above the saddle. It's used to allow the horse to move as freely as it's possible. The rider's body weight is evenly distributed on the saddle, which disburdens the horse. It is an excellent exercise for the rider's legs.
The key to the proper seat for jumping is positioning of the legs. Then, if you have some issues with sitting in the saddle - your legs are probably the reason, and more accurately, their improper actions.
The most serious mistakes concerning the rider's legs are:
thighs and knees skewed outwards
jammed, too tightly pressed against the saddle knees, which causes tension and stiffening of the other joints
knees pointing too inwards, which causes wringing of the calves and forecloses attaining a full contact of the thigh and the saddle, and the whole leg with the horse's side
pressing the stirrups with toes or the mounds of the foot, instead of allowing the legs' weight to fall freely through a stirrup leather to a stirrup and then to the heel
Very often, the mistakes in the seat are left unseen, until they become a real problem at some later point of the training. The "left" behind legs will probably not disturb you while performing a little envelope, but in case of big oxer they'll make you have a huge problem with balance which will make you feel insecure. If you'd ignore the slight imperfections, you'll let the bad habits take their roots. Surely, your results will suffer from this, when you'd try to jump higher obstacles or take part in any competitions.
Note!
During jumping ride it's worth to shorten the stirrups of one or two notches, in comparison to the universal length, they should go as far as a bit over an ankle when the leg is straight.
Jumping gymnastics
Jumping gymnastics require a lot more attention and concentration from the horse, so a very important part of the training are breaks. The rider's sense should tell him or her when to make them, basing on their knowledge of their horse, or the coach or instructor, who closely watch and control how the training goes.
The horse should learn to constantly wait for the rider's signal, and not to uncontrollably gallop after an obstacle. Then, it's worth to force the horse to concentrate more and listen to our orders, after an obstacle keep the gallop for a few foules, then switch to trot, and then to walk or stop and make a volte, once to the left and once to the right.
The horse's work might be diversified also by approaching an obstacle from both sides - once from the left, once from the right side.
Below, we present you a few exercises that should be performed in the mentioned order. Although, let's remember that they don't have to be performed during one training. If you want to focus exclusively on you posture, it's good to stick to two or three arrangements of the obstacles of very low height not to tire the horse too quickly and so we can repeat the rides several times - preferably in both sides with approaching both from the left and from the right side (the best would be rows of 2-4 obstacles made from envelopes or straight rails).
Exercise 1
Benefits
If your horse is uptight or stiffened, repeating this exercise will make him relaxed and more focused. This exercise is excellent for the riding entrants. Poles for the trot set the bouncing point each time in the same place, what conduces attaining the steps' consistency (meaning, repetitiveness) for your horse, and for a young rider - it allows to get used to it and to feel the moment of bounce.
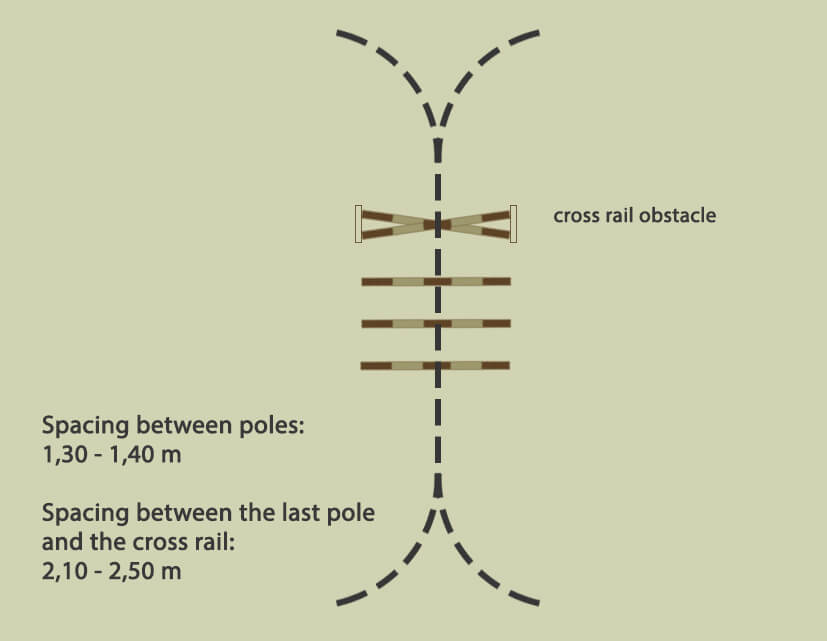
Exercise 2
Benefits
Envelope (the so-called cross) is a perfect first obstacle both for the horse and the rider, who are beginners to jumping. Its asset is that it encourages to jump through its centre. But we have to remember not to put and lean them too tightly, because if the horse knocks one pole it should fall on the ground without hitting any other. A pole that is too difficult to knock might unnecessarily scare or stress our horse.
A little straight rails with hand on the ground every 15 cm ahead might be an alternative solution, but you have to put more energy into leading your horse to the middle.
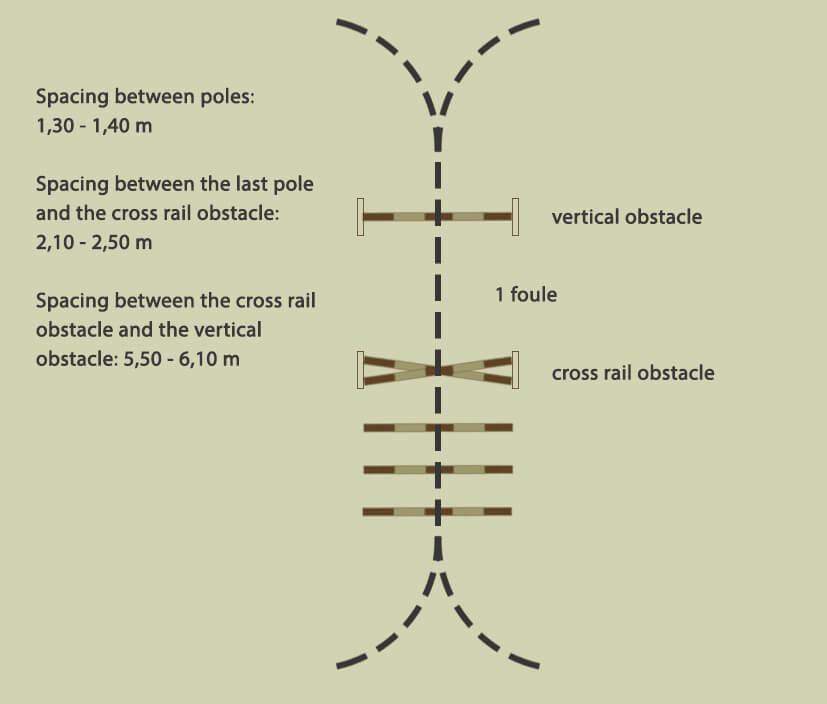
Exercise 3
Ride over the rank in a trot, remembering to land after the first obstacle in a gallop and keep the impulse and rhythm to the end of the task.
Note!
If your horse has to accelerate in the rank, in order to maintain the demanded amount of steps (foules) or unnaturally shorten them - it means that spacing between the obstacles was badly arranged and you have to rearrange it.
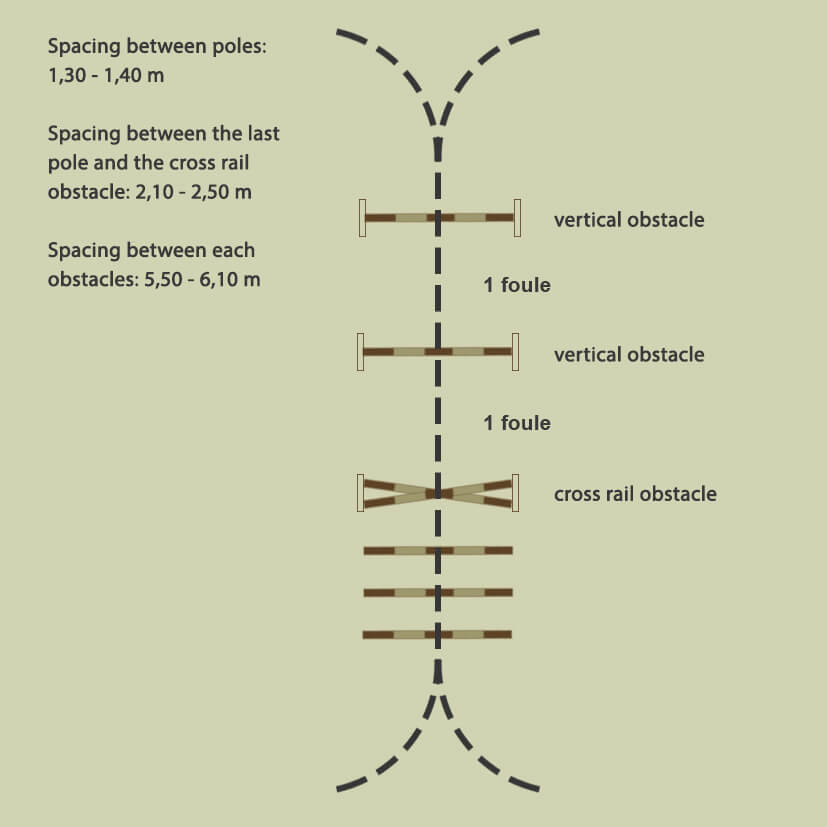
Exercise 4
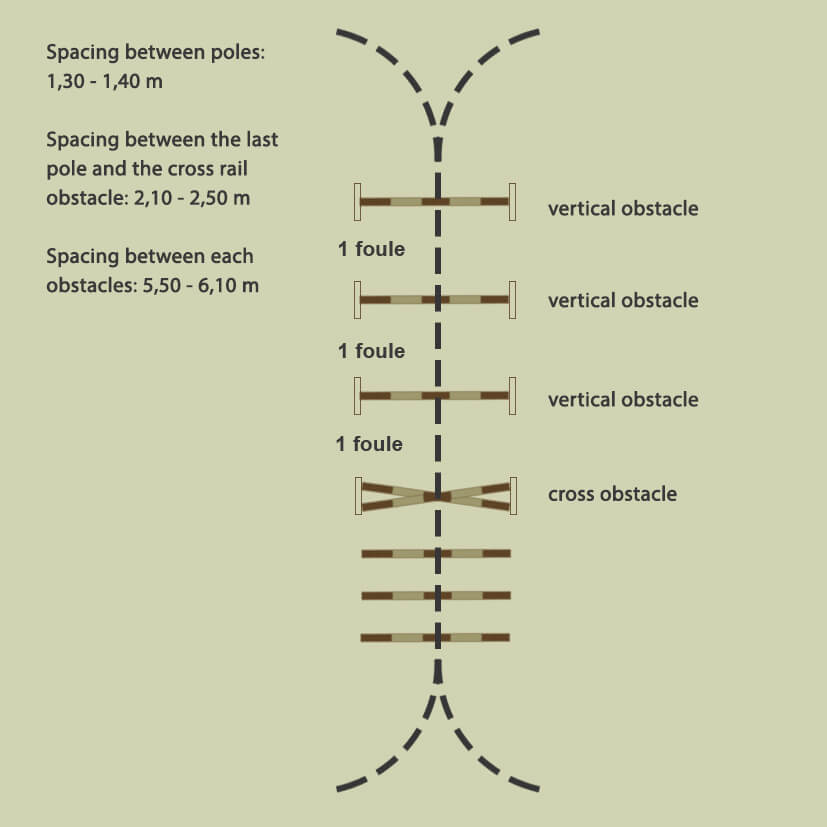
Benefits
Gymnastic ranks consisting of few obstacles in one straight line, preceded with trotting poles with one little jump (the envelope) are the most classic and effective method of training the jumping technique of both the horse and the rider.
Note!
When you add another obstacles in the line, your horse has to put more and more effort into maintaining his balance and concentration during riding through the whole rank. During those exercises, the horse learns how to engage the hinder legs and unburden the front - that means "place" his croup under the log. With each jump in the rank, the horse corrects the mistake he's done on the previous obstacle.
Exercise 5
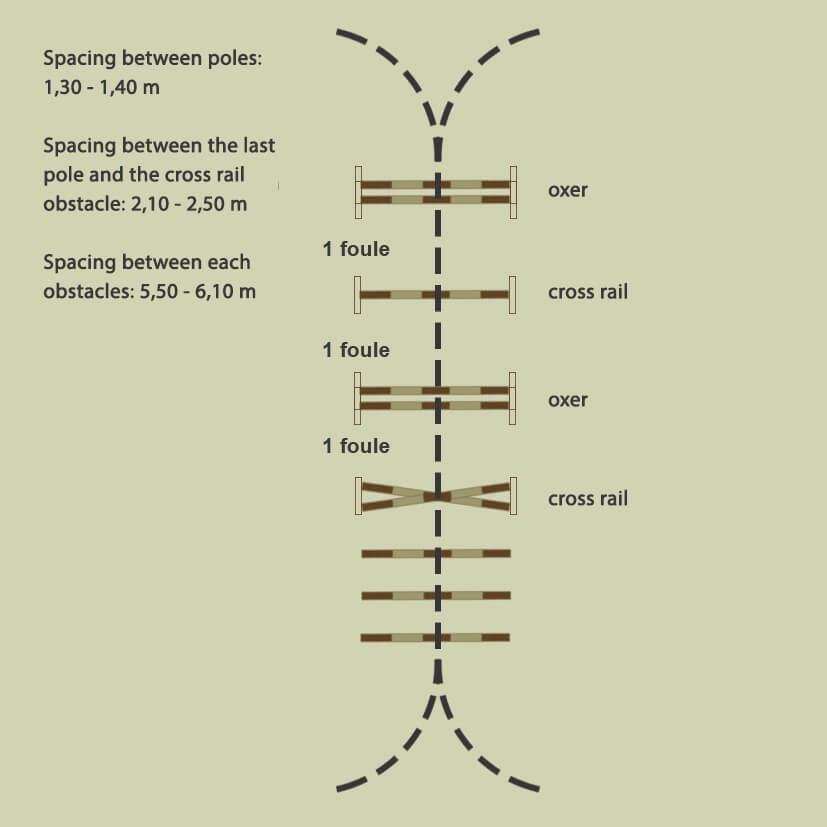
Benefits
Wider obstacles in the rank (oxers) demand the horse to put more impulse and force. By dividing the oxers with straight rails you give your horse an opportunity to correct his balance and change the curved line of jump into more vertical one.
If you use the rank as a way to work on your posture and balance, then you should apply various arrangements of the obstacles and spacings in the rank. Remember that diversity enables development.
While performing the above-mentioned exercises, keep on remembering which elements are easy to your horse and on which he makes the most mistakes. That will allow you to choose the most efficient exercises for him, which will help him develop his abilities.
Errors in the rider's jumps and how to improve them
The rider is able to efficiently interact with his horse only then when he or she can control their own body. Only the proper jumping position will provide full ease of movement and ability to support and teach our horse.
Rooted errors and habits are very difficult to get rid of and it demands more concentration from the rider, and even more time. Correcting the seat is worth performing on the ground poles or low obstacles (up to 30-40 cm) because it doesn't additionally burden the horse, and at the same time will allow us to perform a huge amount of jumps, so also to acquire the proper reactions and habits.
Error
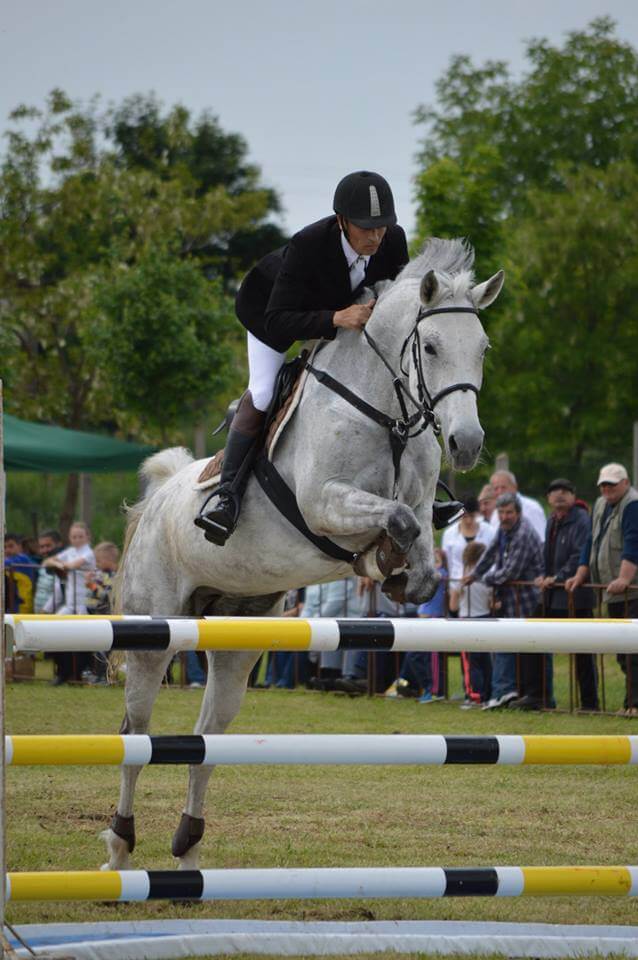
Lack of support in the stirrups and following the horse's body during jumping.

The rider transparently "overtook" the horse, heavily loading his front, at the same time disturbing his balance, source: www.mcgoffs.net
The rider during a jump:
"overtakes" the horse in a jump or "stays behind" the horse
doesn't put his weight on the stirrups
during flight and landing doesn't lean his hands on the horse's neck, shifting his body weight onto them
Correcting the error
It's good to perform this exercise on a rank of low and easy obstacles. The rider on the first obstacle (right before jump) release the reins, splays out his arms to the right angle (making the so-called airplane wings). It will prevent the rider from leaning against the horse on his hands, improve his legs' work and balance. The rider will also learn how to overcome the obstacles while following the horse's movements, without overtaking him or staying behind. Before we start this exercise, it's worth to make a knot at the end of the reins in order to make them shorter and so that they won't tangle during jumping when the rider releases them.
You shouldn't worry about the horse, as he usually does better without the rider's "help". But, it is suggested not to make too distant obstacles from one another, so that the horse doesn't get time to think in between them and couldn't break out (the most efficient combination is jump - leap). It is also a good test for the horse, because it provides us with information whether the horse is able to perform the task on his own, without reins and connection between the muzzle and the rider's hand.
After correctly performed exercises without reins, it's worth trying to get rid of stirrups. The rider should approach the rank without or with the stirrup leather put over the horse's neck. Jumps without stirrups work excellently on our posture - seat, legs' force, and also allow us to feel the horse's movements better.
Of course, this exercise is completely pointless for the unexperienced riders, who don't feel secure while riding without stirrups. It is also worth considering - is the rider who is unexperienced and unable to perform this task ready to jump? I think it's worth to come back to this phase of training and first top the shortcomings up, and then proceed to jumping.
Error
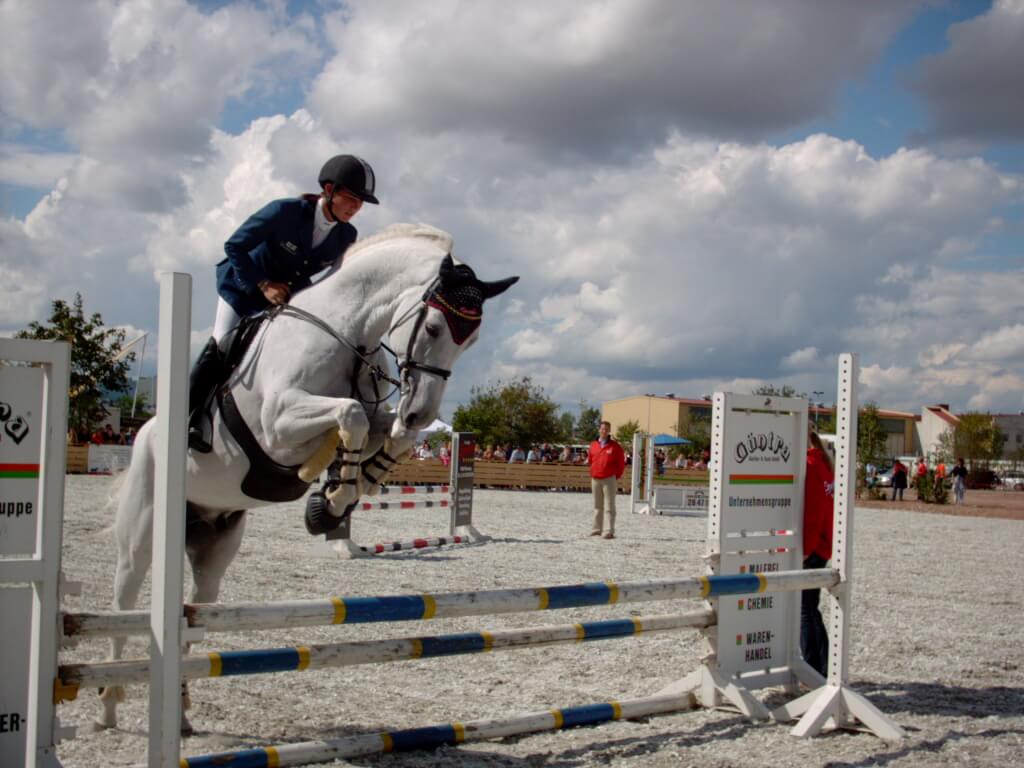
The rider doesn't give his hand to the horse while jumping.
The rider doesn't release the reins to the horse, and at the same time precludes him from balancing his neck, source: bekeslo.hu
The rider during jumping:
has too loose or long reins
backs his hand in the direction of his torso, not following the horse's muzzle, and at the same time restricts his possibility of balancing his neck while jumping
Correcting the error
The exercise which will solidify the rider's hands following the horse's muzzle is conscious sticking them out towards the horse's crest. Before approaching the obstacle, the rider has to stretch the reins and then, during a jump, the rider ought to stick his hands out so that they don't touch the horse's neck. This exercise teaches the independent seat and actions of the hands and shoulders. It's worth to perform it in the jump-leap rank, preceding it with work on the ground poles in a trot, in half-seat, simultaneously minding the release of the hand over the poles.
Error
Looking at the obstacle while jumping.
The rider shifted her centre of gravity, burdening the right side more, so that she could see the obstacle, source: en.wikipedia.org
The rided during jumping:
looks down, on the obstacle which is currently jumped, shifting his or her torso in the saddle on one side and disrupts the horse's balance while jumping
looks at the horse's neck
Correcting the error
It's worth to try one simple way - the instructor or helper stands in a proper distance behind the jumped obstacle in a straight line, raises his hand and shows some number of fingers. The rider's task is to say how many fingers he or she can see while jumping. This task will be the most efficient while jumping in a rank.
Just as well might be picking a point at which the rider will look during a jump (for example any element of fence, the stable's stack, extinguisher etc).
Error
Not planning the track.
The rided during jumping:
Correcting the error
Just like the previous corrections, this one is also worth performing on a very low gymnastic rank, preferably with 1-2 gallop fouls spacing. The rider's task is to look in another direction after each obstacle - for example: after first obstacle he has to look right, after second to look left, and so on. This exercise requires full commitment, forming the rider's ability to quick reaction and freely move his head to the sides without loosing balance.
Jumping gymnastics during trainings has to always be carried out carefully and we always have to stick to formerly arranged plan. Remember that sometimes one jump or one rank too much might negate all the previous success. You can't let the euphoria blind you and you have too keep the common sense - exhausted horse will lose his focus and thoroughness, and it's extremely easy to get him injured. It would be such a pity to send him on a obligatory "vacation" by one prolonged and expansive training.
Always begin very carefully, gradually increasing difficulty of the jumps. Repetitive smoothness of the rides is essential. Jumping is all about making habits, both for you and your horse. Good habits always provide good results.
 Product successfully added to your shopping cart